
So, you have some new technology, and you’re ready to set it up. At first, properly connecting your computer’s mouse, keyboard and printer may seem like an overwhelming and complicated task, but it’s actually a lot easier than you might think. Regardless of what types of devices you have, most computer accessories are set up in similar ways.
If your mouse, keyboard and printer are still in their boxes, each one probably includes a how-to guide that outlined step-by-step instructions. That being said, some items don’t include guides, or they’ve been misplaced … luckily, you can still set up your computer’s accessories in a few easy steps, even if you don’t have the instructions.
If these tasks are too difficult then consider reaching out to HelpCloud Technician by-the-hour and we’ll get you setup and running!
Connecting Your Computer’s Mouse
When it comes to buying a mouse, you have to choose between wired and wireless options. Wired mice are often cheaper, their batteries do not die, and they’re very responsive. Although you’ll never have to search for batteries for a dead mouse, you will give up some desk space, as wired mouses are typically larger.
Wireless mice are simple and travel-friendly. There’s no cord to get tangled, and they’re generally very small in size. One downside is that they do have distance limits. Although some are effective when they’re up to 30 feet away from a computer, others experience issues when they’re about five or more feet away.
A) Connecting a Wired Mouse
Connecting your mouse to a PC, Mac or other computer isn’t overly complicated. The first step is to determine where you’d like your mouse to be placed. Think about the cord and make sure the placement is not near objects it can get stuck on. Once your mouse is in an acceptable place, you can start to connect it to your computer.
First things first, you’ll want to power down your computer. If you try to plug the mouse into one of your ports when the computer is on, damage might occur. To power down a desktop PC or laptop, click on your Windows button in the bottom left corner of your screen.
Next, click “Shut down.” A window may pop up and tell you that various programs need to close before you shut down your computer. Here, you have two options. If you were working on something and want to save your progress, click “Cancel” and save your necessary documents. You’ll then repeat the process above again to continue shutting down.
In the event you don’t need to save what you were working on, click “Force shut down.” When you do this, your computer will automatically close all of the programs it’s running. At this point, your PC should power down.
If you have a Mac desktop or laptop, click the “Apple” key in the top left-hand corner of your screen. A drop-down menu should populate, and you can then click “Shut Down…” When you do this, a pop-up box will ask you if you’d like to cancel or shut down.
Users who have unsaved data that might be deleted should hit cancel and save everything before proceeding. Once everything is secured, you can click the “Shut Down” option on the pop-up, or you can wait 60 seconds and the computer will turn off automatically.
Once your computer is powered off, you can connect your mouse. Most wired mouses are USB-based, meaning they must plug into a USB port on your computer. This type of port is the standard mouse connection option. When a USB device is connected to a USB port, it transfers digital data. The port will also provide your mouse with the electric power it needs to operate.
The square-shaped USB ports on your computer should say “USB,” or they can be identified with one of the symbols pictured below. Some computers have two or more types of USB ports, but each one will work for your mouse.
Once you’ve identified a USB port, you’ll want to plug your USB mouse in. If it does not seem to fit, rotate the USB cable 180 degrees and try again. Once the fit is secure, you can power up your computer again and see if the mouse is working.
In the event you experience any trouble when you power up your computer, reach out to the computer support company My Fast PC for troubleshooting assistance.
B) Connecting a Wireless Receiver Mouse
There are a few types of wireless mouses on the market. One of the most popular options is a mouse with a wireless receiver. When you unpackage your mouse, look to see if a small plug comes with it. If so, you have a wireless mouse with a wireless receiver.
People with this type of technology should start by powering down their computer. Instructions on how to do so safely are outlined in section A above. Once your computer is turned off, you can plug the wireless receiver into one of your USB ports. How to identify a USB port is also covered in the section above. Once your receiver is plugged in, turn on your computer.
Next, you’ll want to see if your mouse needs batteries. Flip your mouse over to see if it has a tray on the back. You may need a screwdriver to open the tray, or you might be able to open its latch with your finger. If there’s a place for batteries, insert new batteries. If there is no battery tray, your mouse may require charging. If this is the case, it should have come with a charger and a charging port.
Once your mouse is charged or has batteries, it should start to function. A few mouses have “On/Off” switches, so if yours isn’t working, see if you can flip it into the “On” position.
Once your computer and your mouse are turned on, you’ll need to connect your mouse to your computer. A lot of mice come with “Connect” buttons, which will connect the two pieces of technology. In the event you can’t find this button, call 1-800-573-8028 for technical support.
C) Connecting a Bluetooth Mouse
Some wireless mice use Bluetooth to connect with a computer. Bluetooth is a short-range wireless technology that connects a variety devices, from mobile phones to wireless speakers.
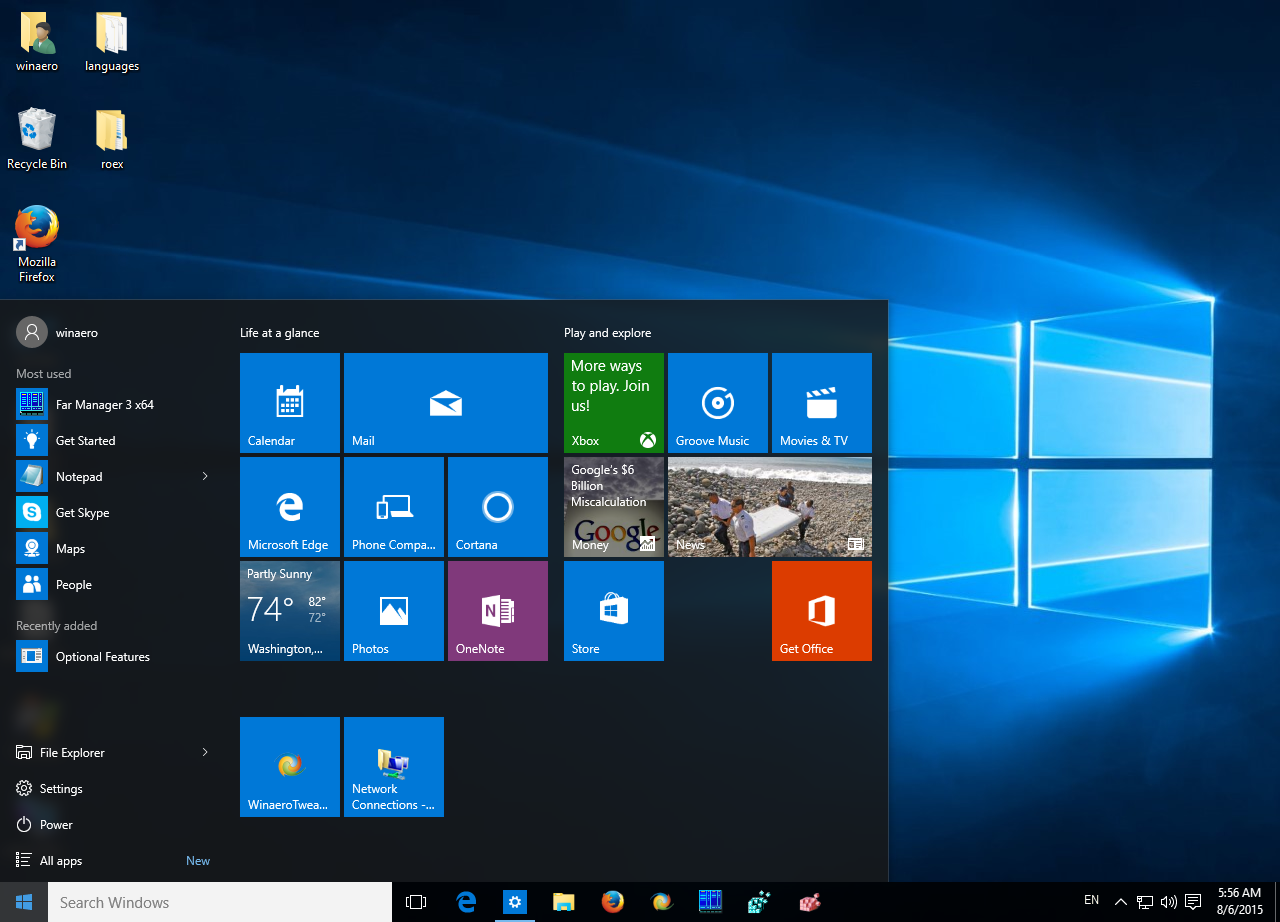
Windows users can connect via Bluetooth by clicking on their “Windows” menu in the bottom left of their screens. After the menu is open, click on the “Gear” menu, also known as “Settings.” Click on “Devices,” and then select “Bluetooth & other devices.”
Make sure your Bluetooth is turned on, and your PC should start to look for nearby Bluetooth devices. After a minute or so, your wireless mouse should come up in the list of “Ready to pair” devices, and you can click “Pair.” Once you complete these steps, your mouse should be working. Users who run into difficulty or have a different Windows version than Windows 10 can receive further steps from My Fast PC directly.
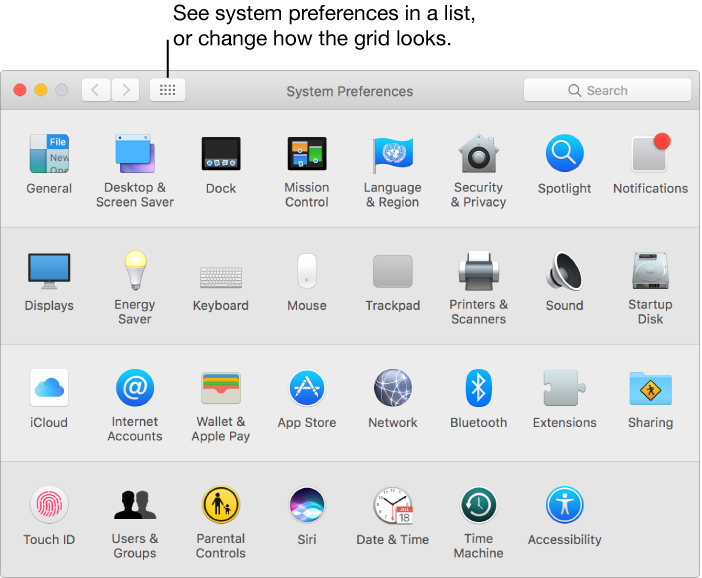
Mac users with Bluetooth mice will start by pressing the “Apple” menu in the top left of their screens. Once the drop-down menu is open, click “System Preferences…” Find the “Bluetooth” icon and click on it one time.
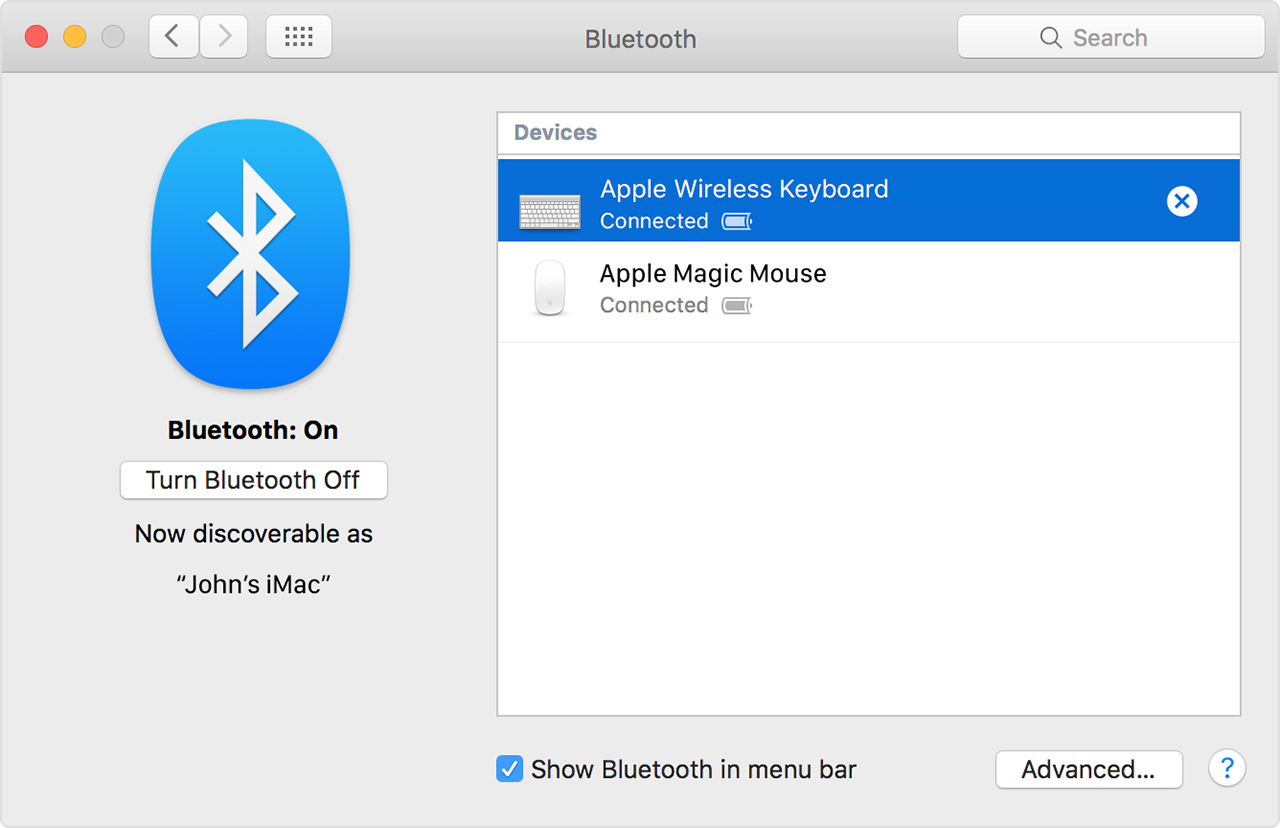
A Bluetooth menu should open, and you’ll want to hit the “Turn Bluetooth On” option if it’s not on already selected. A list of devices will populate, and you’ll want to look for your mouse. Once you see it, select the “Pair” button that’s next to its name. As long as it’s turned on and its Bluetooth is enabled, it should connect within moments.
Connecting Your Computer’s Keyboard
After you’ve read the section above, connecting your keyboard will be a breeze. Many keyboards are USB-based, so they attach to your computer the same way a wired mouse attaches. Make sure your computer is powered down, and plug your keyboard’s USB into a USB port on your computer. When you turn your computer on again, you should be able to use your keyboard.
People who have wireless keyboards will likely either use a receiver or Bluetooth to connect their devices. A keyboard’s receiver functions a lot like a mouse’s receiver. Plug your keyboard receiver into a USB port on your computer while it’s turned off.
You’ll also want to make sure your keyboard has the necessary batteries or charge it needs to function before you turn your computer on again. Once you’re sure the keyboard has power, turn on your computer. At this point, your receiver and keyboard should connect.
A Bluetooth keyboard will connect the same way as a wireless mouse. Once your computer’s Bluetooth menu is open, look for your keyboard in the device section. As soon as it populates, you’ll want to pair with it. In moments, a connection will be established, and you should be able to use your keyboard wirelessly.
Connecting Your Computer’s Printer
Last, but not least, you’ll want to connect a printer to your computer. If your computer has a wire, it’s likely a USB-based printer. Before you plug it in, place it down and make sure you like its position. Once it’s in an acceptable area, find its USB cord and plug it into your powered down computer. When you turn your computer on again, you should be able to use the printer.
To test the connection, open something you want to print. An easy way to do this is to open Microsoft Word or Pages for Mac and type “Test.” Next, click the “Office” button or “File” in the top left-hand corner of your screen. Click “Print” and make sure the “Printer” default is the new printer you’ve attached. Once you’re happy with your settings, select “Print,” and your printer should make a copy of the document.
Bluetooth printers are also common and should be connected in the same fashion as a Bluetooth mouse. Open your computer’s Bluetooth menu and search for available devices. As long as your printer has power and its Bluetooth is enabled, it should pop up with the option to pair. Pair your computer with your printer, and then print a document to make sure the connection is working properly.
A Word on Software
Depending on the mouse, keyboard or printer you own, your computer may need additional software to run the new technology. When this is the case, a CD is often included in the product’s packaging.
When you put the disk into your computer’s disk drive, a menu will likely come up and ask you if you want to install the new program. You’ll want to say yes and make sure the software is copied onto your computer. In the event you lose this disk or nothing happens when you put it into your computer, My Fast PC can help resolve your issue.
Wrapping Things Up
Computers offer a world of convenience, but their setup often seems anything but straightforward. Luckily, with the guide above, you can successfully connect three must-have accessories to your computer.