
When you need to scan something quickly, you want your devices to work properly. Of course, technology doesn’t always cooperate, especially when you seem to need it most. There are many things that can go wrong during the scanning process. Depending on the issue and which device you use, different steps should be carried out to troubleshoot the malfunction.
This article contains information on two common types of scanners, flatbed and sheet-fed scanners. If you are having any kind of difficulty determining which type of scanner you have, consider reaching our HelpCloud Technicians for remote support to help you resolve the issue. In general, this article will be most helpful for users with scanning printers. However, much of the information below can also be applied to stand-alone scanners.
To begin the troubleshooting process, look to see if your scanner is displaying an error code. If it’s not, check your computer’s error messages. Generally, the issue will display on the scanner. Your scanner will also likely provide you with step-by-step instructions on how you can move forward. If no error message is found, though, the common problems and solutions reviewed below will come in handy.
1) Issues Fixed With the Oldest Tricks In the Book
Restarting your scanner can magically resolve issues you’re having, but why? The easiest way to understand this occurrence is to think of a human. People need sleep, sustenance, shelter and other necessities to live. For a scanner, the same logic can apply. Software may malfunction when it is overused, overloaded or otherwise interfered with.
After you power down your device, wait a few minutes before you press the restart button. When you let your scanner rest in the off position for a couple of minutes, it’ll have time to power off completely. Then, give your device time to power up before you try to use it again. Trying to use the device as it’s powering up may slow it down or cause another error, so you want to give it time to turn back on before you give it any commands.
There’s also a chance your computer is bogged down, interfering with your scanning. To see if this is the case, remove all CDs, DVDs, USBs and other external devices from your PC. Then, start your computer in safe mode. Press the “Start” menu and click the down arrow next to “Shut Down” followed by “Restart.” As your computer starts again, press and hold the “F8” key. For proper use, you must press this key before the Windows logo appears. Navigate to the “Advanced Boot Options” section and select the safe mode option you would like to use.
On a Mac, turn on your computer and press and hold the “Command” and “R” keys at the same time. Tap on “Utilities,” “Disk Utility” and hit “Continue.” On the sidebar, choose the volume that you’re using. Select “File” and “Mount from the menu bar.”
At this point, you’ll need to enter your password. After your password is typed in and entered, quit out of the open menu. Go to the menu bar at the top of your screen and open “Terminal” from the “Utilities” menu. You will then be able to restart your computer in single-user mode.
2) Improper Connection
So often, wires disconnect, especially if you have grandkids, a partner or other family members who also use your devices. Before you get too far into troubleshooting, make sure everything is connected properly. Is your scanner connected to your computer? Is there a missing power supply connection that’s required for the scanner to operate?
If possible, switch to a different USB or connection cable to see if the issue lies in the connector you’re using. Another option is to change the USB ports you’re using to see if a faulty port is the cause of your issues. As you unplug and replug your devices, it’s also good to remove accessories. If you’re using other ports to update your phone, stream visual via HDMI, etc., stop these other processes momentarily by disconnecting to see if your scanner works better.
Here, it can also be helpful to look through your device’s literature, either by reviewing the manual or looking up its information online. Generally, your scanner will have a testing process you can follow to diagnose problems. To learn more, reach out to your scanner’s manufacturer and ask if there’s an at-home test you can perform.
3) Scanner Won’t Scan
Sometimes, your device may not scan when you tell it to do so. There are a few things that can cause a scanner to not operate correctly. First, make sure your scanner is ready. Flatbed scanner users can clean off their glass and make sure the document is positioned correctly. Sheet-fed scanner users look for a paper jam in their scanner and check to see if the document is in the feeder correctly.
Another thing to look at is the connection. Is your scanner connected with a USB or wireless network? Again, USB issues can sometimes be corrected from removing and replacing the USB into the scanner and computer. For a wireless connection, make sure your WIFI is on and your printer is connected to your computer.
4) An Update Or Reinstallation Is Required
Your scanner may not work properly because an update is required. Apple, Microsoft and other computer creators design their systems to be updated. Similarly, many scanners require occasional updates. A new software version can improve your device’s security, enhance its features and keep it compatible with different applications.
Windows users should navigate to the Windows’ icon, hit “Control Panel” and “System and Security.” Under “Windows Update,” check for possible updates and manually install any available releases. Next, open “Device Manager” on your computer. Under the “Printers” section, right click on the name of the printer you’re using. If there’s an option for “Update Driver,” you’ll want to select it.
As a last resort, you can delete and add the printer again. USBs that connect the computer to the scanner should be removed. Then, under “Settings,” click “Devices,” “Printers & scanners,” “Remove device” and “Yes” under the scanner you want to disconnect.
To add the scanner again, connect it using a USB. For a wireless connection, go to your PC’s “Settings” app. Under “Devices,” hit “Add a printer or scanner.” Your computer may automatically recognize the printer you’re trying to connect.
If the scanner is detected, click on it and follow the instructions for installation. A user who doesn’t see his or her device listed will need to click “The printer that I want isn’t listed” and follow the on-screen directions.
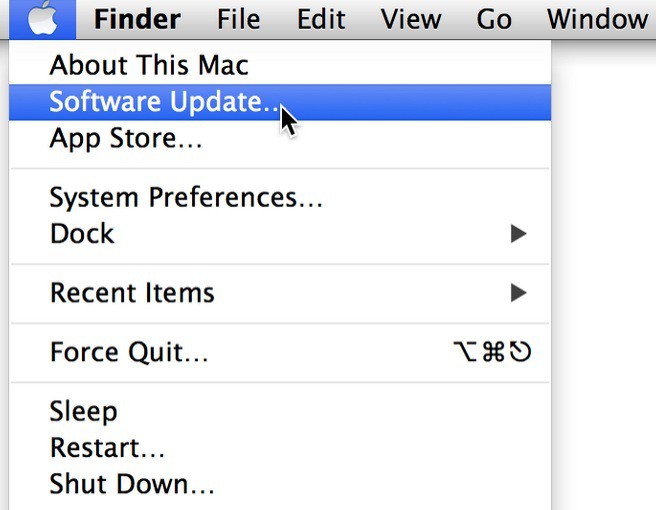
On an Apple computer, open the App Store. Under the “Updates” tab, click “Software Update.” Any available updates can then be added when you click “Update.” After your Mac downloads, installs and restarts the update, your software should be current. Also, your printer drivers should be updated.
In the off chance you continue to experience problems, you can try the following steps: Under the Apple menu, open “System Preferences.” Once you click on the printer icon, a menu should open. Look at the device you’re using to scan and click the “-” button to remove it from your printer list. Make sure you also unplug a USB if you’re using one to connect your scanner to your computer.
Now, click “Library” and “Printers.” Under the items that open, look for a folder titled with your printer’s name. If you see a folder, drag it to your trash. You’ll then empty the trash and restart the computer. To add the computer again, plug it in with a USB or open your printer menu again under “System Preferences.” Wireless scanners can be added by pressing the “+” button.
5) Paper Problems
On some printers, paper comes from multiple sources. Scanners that say they’re out of paper but have paper loaded correctly in the tray might have another paper source. Make sure that all trays for your scanner are loaded with the correct paper type in the right position when you get the “Out of Paper” or “Please Add Document for Scanning” error.
Another common issue users see with scanners is paper jams. When paper jams, there is likely an issue with the path the paper follows. Often, you’ll have to physically remove the jammed paper to proceed. Look up your specific scanner’s make and model online to get specific information about how you can open your device and remove the jammed paper. Again, it’s also smart to check the paper type you’re using to make sure it’s compatible with your device.
Overcoming Common Scanner Issues
With a scanner, you can convert images, printed text and more to digital image files. When working properly, image scanners are amazing. Unfortunately, they don’t always operate the way users would like.
Before you get stressed and frustrated that your scanner isn’t working, see if you can take a step back. A lot of the time the fix to a scanner problem is simple. You might only need to unplug and reconnect your device to get it to function correctly.