The Aw Snap message appearing on Google Chrome preventing from accessing any sites or even settings has the resolution to fix it below.
Method 1: Fixing the Google Chrome application
- On your desktop ‘Google Chrome’ shortcut right-click on it and select properties
- In the target address press space after the quotation marks, and add the following text: –disable-features=RendererCodeIntegrity
- Click apply,
- then it’ll ask for administrator privileges
- click okay
- then click yes to allow the administrative change.
Opening ’Google Chrome’ through this application will disable the Renderer Code Integrity feature and helps to get rid of the ”Aw Snap” Error.
To restore/recreate your shortcuts a bit more information regarding recreating your icons it’ll be listed in Method 2.
Method 2: Fixing Internet Shortcuts impacted by the Aw Snap error
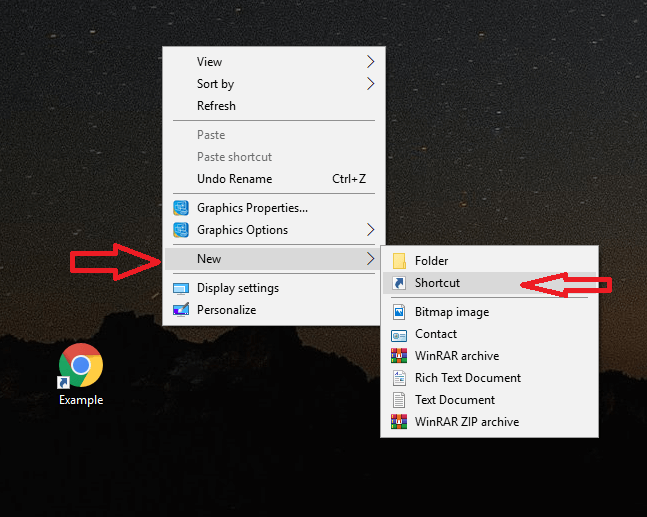
- On your desktop right-click the background. Hover over the ”New” option, and select the “Shortcut” option (see image below).
- In the window that shows click shortcut, and it’ll bring a window up asking you to “Type the location of the item:” with a bar below.
- Enter the below with just replacing the website with your desired location
example: “C:\Program Files (x86)\Google\Chrome\Application\chrome.exe” –disable-features=RendererCodeIntegrity –url= https://www.helpcloud.com
Once you’ve done so it’ll create an application shortcut with the disable feature command that was used in the Google Chrome shortcut in Method 1.
If for some reason Method 1 and Method 2 aren’t working for you Method 3 will describe how to install and disable auto-updates for Google Chrome
Method 3: Installing Google Chrome version 78 (Pre-Aw Snap Error)
- Open Control panel and under “Programs”, navigate to “Uninstall a program”
- Uninstall Google chrome but save your user data by leaving the box unchecked to keep your user data.
- Use the link below to install Google Chrome v78:
https://dl.google.com/release2/chrome/AOwc74zXwu9gfZo8W5cKY0Y_78.0.3904.70/78.0.3904.70_chrome_installer.exe
This resolves the error caused by Aw Snap. If you’d like to, disable auto-updates until the issue is resolved after Google Chrome V79. Follow Method 4 for disabling Auto-update of Google Chrome.
Method 4: Disabling Google Chrome Auto Update
Once Google Chrome version 78 (or any version you are currently using) is installed. Open the Registry Editor by following the steps below:
- Press the Windows key + R, type regedit.exe and press Enter
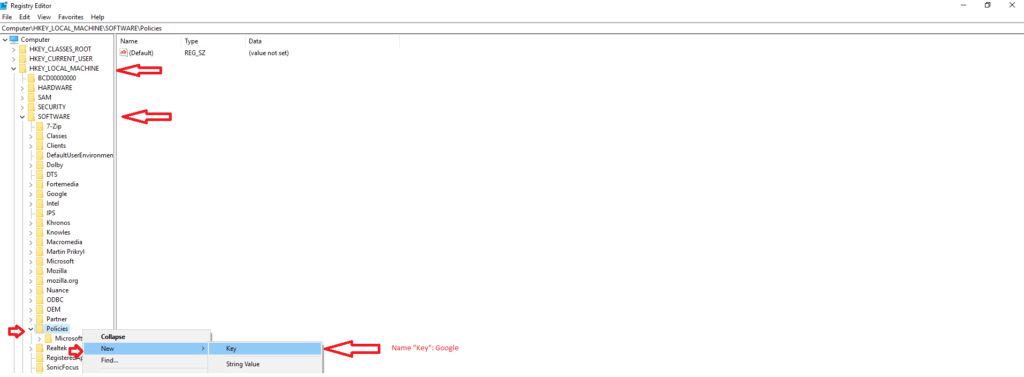
- Navigate to HKEY_LOCAL_MACHINE\SOFTWARE\Policies\Google\
- If Google is not there in the Policies list right-click where Policies is and add a Key (see first image below).
- In the space, it creates write the name “Google” to create the key we’re looking for.
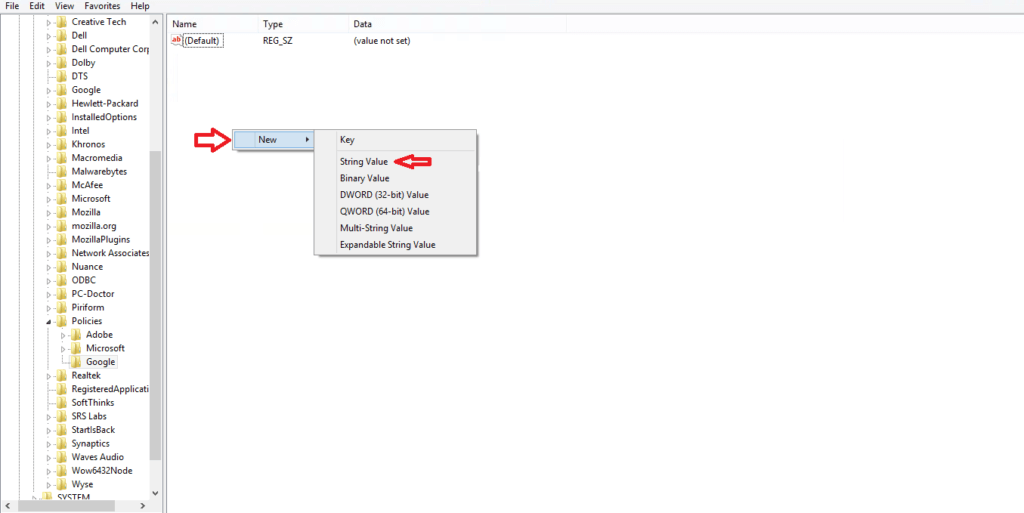
- In the Window to the right, right-click and hover over “New” create a String Value (see second image below).
- In the “String Value” enter in this as the description name “DisableAutoUpdateChecksCheckboxValue”
- Double-click on the “DisableAutoUpdateChecksCheckboxValue” that we created and change the value to a 0 (see third image below), this will disable the auto-update feature of google chrome. When you want to update the Google Chrome for the future you can follow our above process and re-access this String Value and change it to a 1 to re-enable Auto-Updates.

If all of this is too difficult then reach out to our hourly technicians and we’ll get this fixed for you fast.