For many of us, multi-tasking has become one of those things that we say we aren’t good at and yet we find ourselves doing it pretty much all the time. It’s almost as if it has become second nature.
We are busy doing one thing, then find ourselves jumping to the next before we are finished with the first and before we know it we have six programs open and running in the background on our computer, along with a few documents and a web browser.
The question we have to ask, though, is what happens when we close off those applications or programs by accident? Is there a quicker way to gain access to all that information we were working on?
The simple answer to this question is a most emphatic and resounding yes.
With Timeline, everything is kept track of in a neat timeline, even allowing you to see when it was that you were working on something. And the bonus part of it all is that it even syncs across all of your devices, providing they’re connected to your Microsoft account.
Frontiers of Technology
Windows Timeline is a feature that first appeared with the Windows 10 update in 2018. By using this feature it will help you to remain on top of all that you’re working on by allowing you to jump right back into it with just a few quick clicks of the mouse.
And yes, it really is as simple as that!
No more searching through folders trying to remember where you saved that elusive document. No more pulling your hair out in frustration because you can’t remember just which application it was that you were running while doing a certain project. Whilst not all third party apps support Windows Timeline, Timeline does work well with all of the Microsoft apps.
Before taking a look at exactly how this feature works, we first need to make sure that you are running the correct version of Windows to enable you to use this feature.
To do this, simply go and right-click on your Start menu, left-click on System and then under Windows Specification you need to make sure that under Version it says 1803 or higher.
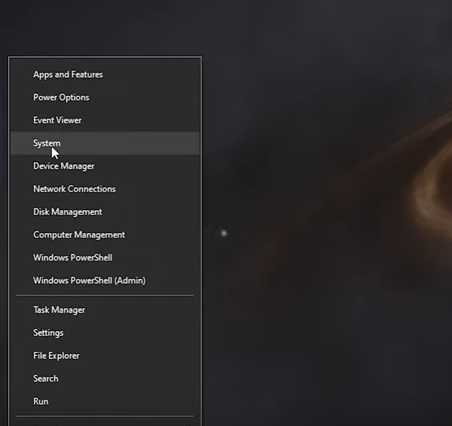
If you don’t have Version 1803 or higher, you will need to update your Windows to get it for you to be able to run this feature.
Into the Unknown (Know What’s What)
Now that you have made sure you have the correct version of Windows, it is time to go into the unknown and find out whether or not your Windows Timeline is active and ready to use.
It is really easy to do this, all you have to do is to go to the Search box at the bottom of your screen, left-click on it and then type in Activity History (depending on your version of Windows you could also access this search box by left-clicking on your Start menu and just typing in Activity History).
A pop-up menu will come up, simply left-click on the tab called Activity History Privacy Settings. Underneath the heading Activity History on the right-hand side, there will be a little check box. Make sure that there is a tick inside this check box.
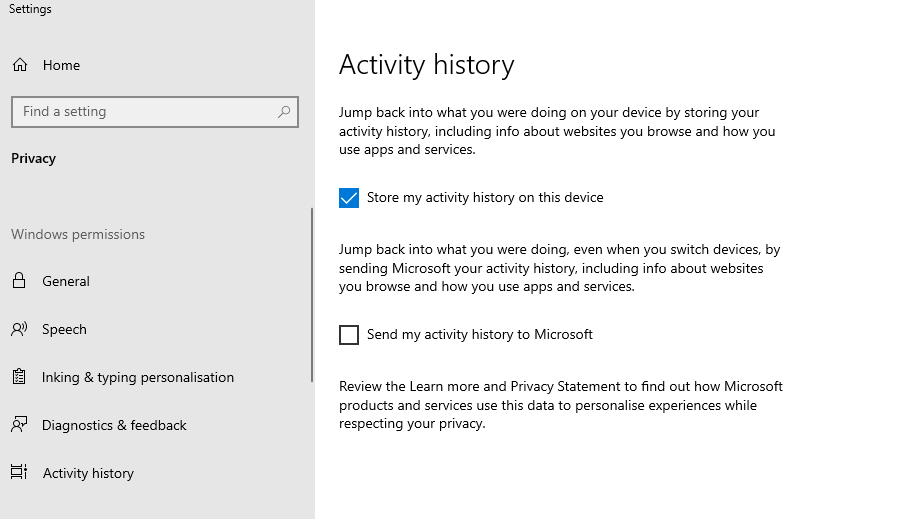
If the box does not have a check mark in it, just left-click in the box so that a check mark appears. Once you have done this, you can go back to your home screen. Now you should see a little task bar icon at the bottom of your screen next to the search bar or the Start menu.
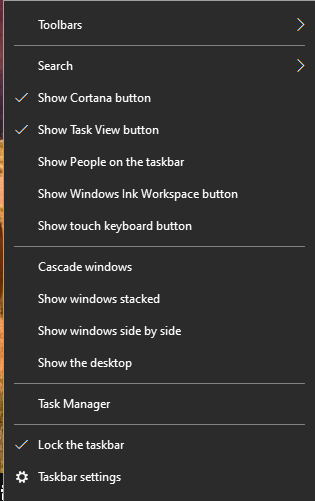
If you don’t, right-click on your taskbar at the bottom of your screen and make sure that there is a check mark next to the Show Task View Button.

If there isn’t a check mark, simply left-click next to it and then the little icon will appear after a few seconds on your taskbar.
Time Traveling With Microsoft
Now that you have it all set up, you can now start to explore your Timeline. To do so, left-click on the Task View icon and a screen will open up that shows the applications you have open at the moment.
However, whilst having all your open applications right at your fingertips is truly awesome, what we are going to be concentrating on are the applications and documents or images listed below that, which is what is known as your Timeline. With this timeline you are able to travel back in time to days and even weeks previously to see documents you were working on or applications you used.
If you have a Microsoft account and are signed in, your Timeline can keep up to 30 days’ worth of snapshots of applications which you have used in the past month. Alternatively, if you have only just enabled it, there will only be the latest things which you have done during the day.
In the Timeline, it will show snapshots of applications or programs you used yesterday, the day before and earlier in the week etc. Then, you will be able to scroll through the entire Timeline and look for the snapshots of the programs you want to go back and use or the documents you wish to reopen and work on. This is a much quicker option than searching through folders and so on.
If you remember more or less what the document you are looking for is called, you can simply left-click on the search bar in the top right-hand corner of the screen and just search for it.
You will notice, though, that there will be some programs that won’t have snapshots or thumbnails in your Timeline. This is because quite a few third party developers have not yet integrated a way to get Timeline to function with their applications.
Once you have found the snapshot or thumbnail of the application you are looking for, you can left-click on it and it will resume where you left off. As you can see, it’s honestly one of the simplest ways to immediately access applications or documents etc that you have used recently.
How-to Disable Windows Timeline and Clear Activity History
Now, another thing to keep in mind is that not everything that appears in your Timeline needs to stay there. If there is no need for it and you want to cast it away to the deserted island of deleted items, simply right-click on the thumbnail and then you can click on Remove and it will then be removed from the list.
If you have no wish for any of the thumbnails to remain in your Timeline and you want to clear them all out for that specific day, simply right-click and an option will appear which will say Clear All From Earlier Today and then it will clear out the entire day.
But what happens if you don’t want the Microsoft Timeline functionality at all? Never fear, there is a solution for that as well. You can disable the functionality as easily as you enabled it. All you have to do is to go back into your Activity History and then uncheck the little tick box that says Store My Activity History On This Device.
You will want to make sure that the other check box on the page is also unchecked, as well as ensuring that the button next to the Microsoft Account is toggled to the Off position.
Now, even after doing all of that, your Timeline history will still be visible. For it to completely disappear, you will need to left-click on the Clear button at the bottom of the settings page under Clear Activity History.
It will ask you to confirm that you want to clear out all the Timeline history. When it does, just left-click on the Ok button and then a small tick mark will appear next to the button.
If you left-click on the Task View icon again, you will see that there is now no history in your Timeline. It will only show you the applications which you currently have running and nothing else.
It’s All About Preferences
As you can see, this very handy little tool is all about user preferences. Not everyone wants to see a timeline of all their activity, whereas others will find it a tool they cannot live without. At the end of the day, though, it is entirely up to you whether or not you wish to use it.
Since we aren’t all the same, there is no right or wrong on whether or not to use this tool. It can be a really useful tool for the multi tasking populace but it can also be an irritation to those who don’t want to see their timeline history paraded before them at the click of a button.
As always, if you’re needing more information on Windows Timeline, consider reaching out to HelpCloud Technicians for remote support.
