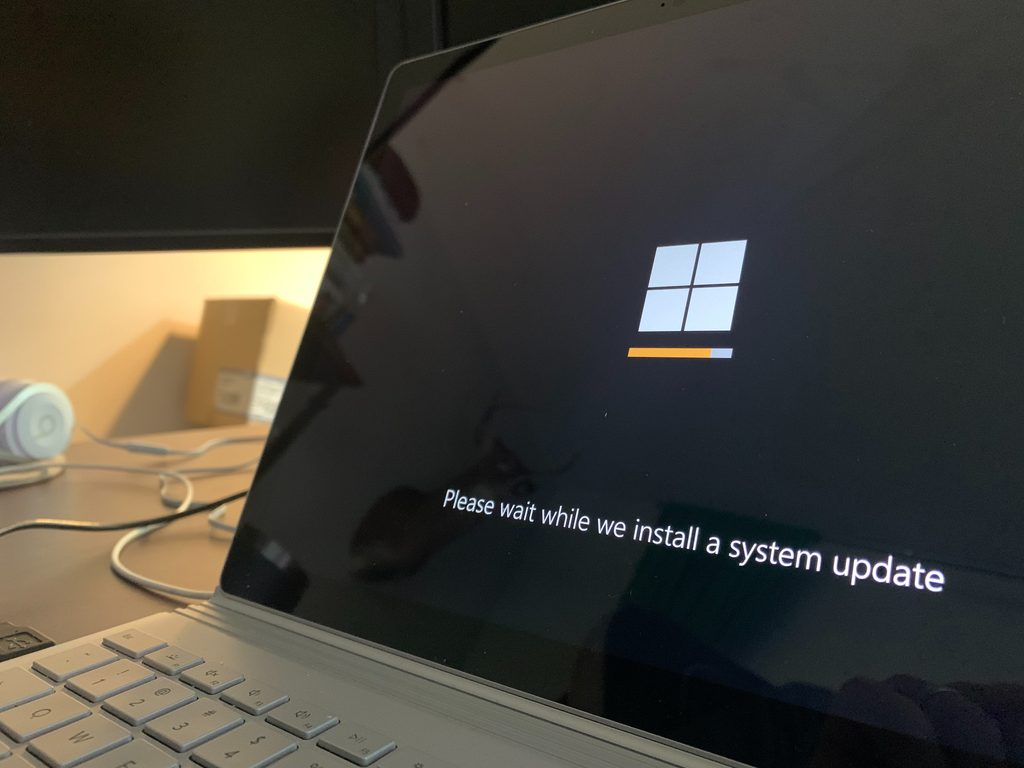
It wasn't too long ago that having to upgrade your computer's OS (Operating System) was basically unheard of. These days, however, it seems to be quite the regular occurrence. Microsoft has been at it again and the new Windows 11 is ready for download and installation. Be sure to read our blog post on the top 5 new features of Windows 11.
Before getting started, you will need to see whether or not the computer you are trying to install Windows 11 on is compatible and able to handle the new OS. There are two things which your computer absolutely needs to have in order to run the new update.
One is an empty 8GB USB or bigger hard drive (the reason it needs to be empty is because anything on the flash drive will be erased during the installation process) and the other is TPM 2.0 -- Trusted Platform Module.
Most of the newer computers automatically have TPM 2.0 enabled but if your computer is showing that it isn't compatible with the new Windows 11 upgrade then it could be that it simply is not enabled and you just need to turn it on.
To check whether or not you have these options enabled, go to your home screen on your computer and simply hit the Windows and R keys on your keyboard together.
This will bring up a small dialogue box into which you will need to type tpm.msc and then hit the Enter key or left-click on OK. This in turn will open up a new window called TPM Management on Local Computer.
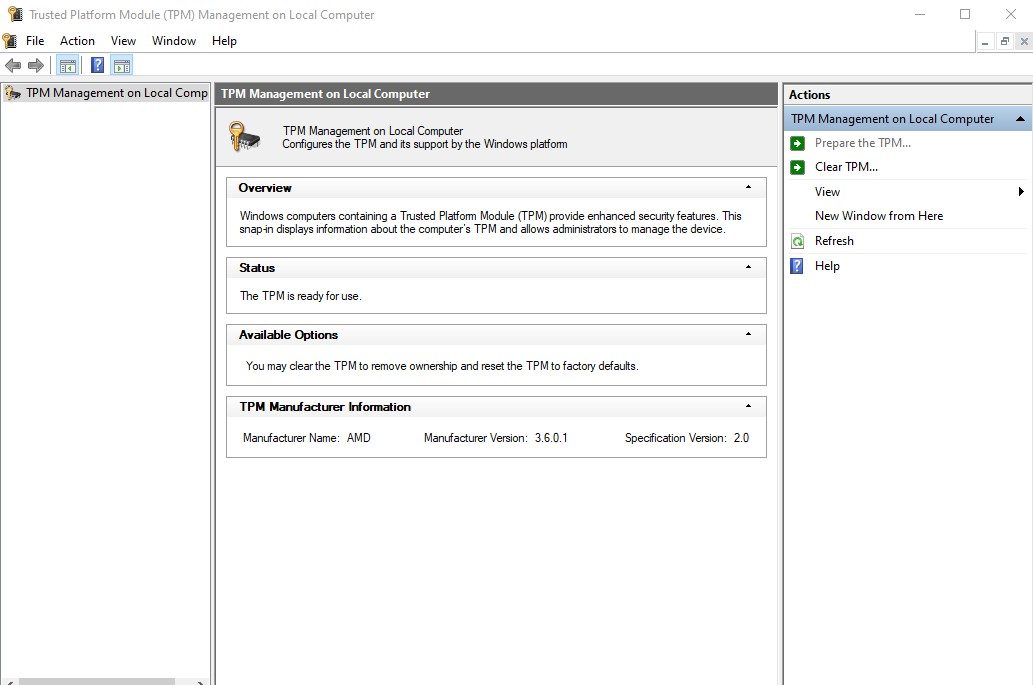
If it says "ready to use" under the Status bar, and if it shows that you're running version 2.0 then you can go ahead and follow the next few steps. If it doesn't, you will need to have your manual on hand in order to turn this option on in the BIOS.
Every computer manufacturer has a different way of getting in the BIOS (Basic Input/Output System), so you will need to find out which one your computer uses. Some computers use the Delete button as the BIOS key, others use F2 or F8 or even F10.
If you aren't sure which key is the BIOS key, you can either check your manual or else you can Google the make and model of your computer along with "BIOS key" and it should give it to you.
Before you start, make sure that you have done a backup and saved everything on your computer. It is always better to be safe than sorry and having a recent backup is always a good idea, no matter what.
When you are in your BIOS, go into Boot and Security and then look for Enable TPM or something similar. You will need to follow the instructions in your manual and then once you have enabled the TPM option you can press F10 to save and go out and just follow the above steps again to make sure that it has been enabled. Once you have got the TPM enabled you can continue with the steps below to install Windows 11.
Installing Windows 11 From a USB Drive
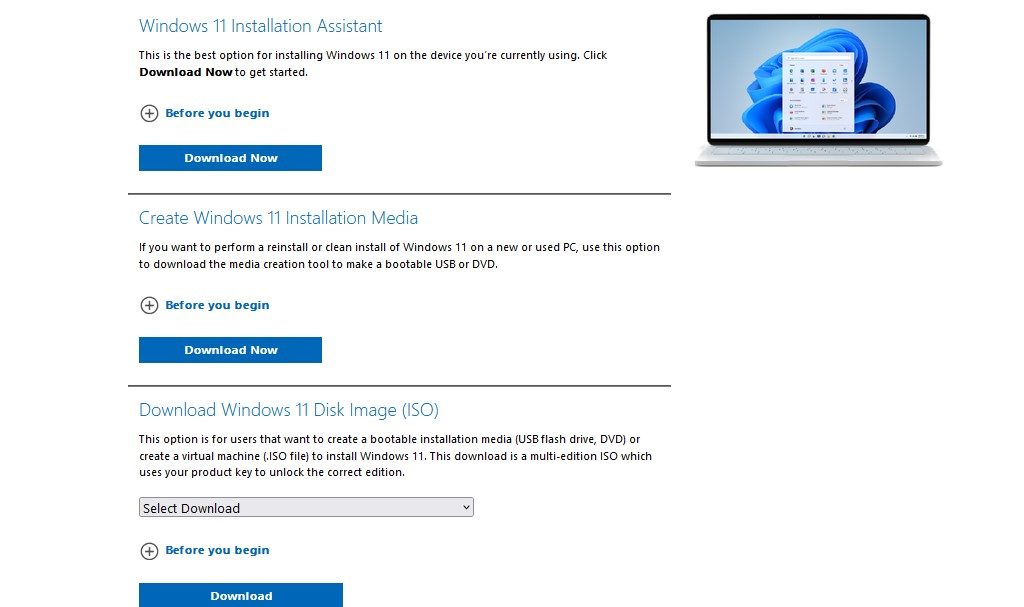
Firstly you are going to need to download the media creation tool which is basically an assistant that will download the installation files onto your USB drive. In order to do this you can open up your web browser and navigate on over to the Microsoft Download page.
Scroll down to the second download option which is Create Windows 11 Installation Media. You might want to check the Before You Begin (left-click on the + sign) to make sure that your computer will have enough space and speed etc. for this update.
Left-click on the Download Now button and let it finish downloading. After it has finished downloading you can close off your browser and go back to your home screen. Open up your Downloads folder and double-click on the MediaCreationToolWindows11.exe file to open it and then left-click Accept in order to accept the terms and conditions.
It will now say that the program is getting a few things ready, and while it does, now would be a good time to make sure that you have your USB drive at the ready and plug it in to your computer.
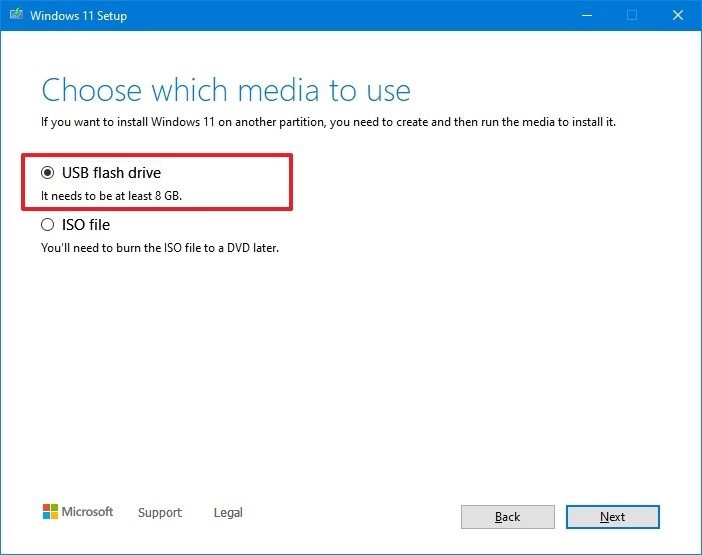
You will be given the option to either use the recommended settings (which means that the language and edition will be grayed out) or you can un-tick that check box and select your own language, although the edition will still probably be grayed out. Now left-click on Next and then select the USB flash drive option in the next window and left-click on Next.
Select your USB drive from the menu provided and then left-click on Next.
Now it will download -- the time it takes to do this will depend on how fast your internet is but once it is done you can then unplug your USB and then plug it into the computer you wish you install Windows 11 on. Turn your computer on and as soon as you see the manufacturer's logo appear you will need to press F12 or F2 continuously to get into the boot menu -- or even the Delete key.
Once the boot menu opens up you will need to select your USB drive from the menu listed and then hit the Enter key. This will then take you to the next screen.

You can either change the settings or leave them as they are (generally the default settings should be the correct ones) and then left-click on Next and then on Install Now.
If you have a product key (you will get this if you have bought Windows 11) you can enter it, otherwise just left-click on I don't have a product key, then select the version of Operating System which you have (if it gives you an option) and then left-click on Next, tick the prompt that says you have read and agree to all the terms and conditions and then left-click on Next.
Select the option for a Custom Install and then select the drive where you want to install Windows on. If you have more than one drive, you will be shown multiple options.

Once you have selected the drive, left-click on Next and then wait until the installation has been completed and then let your computer restart. Once it has restarted it is going to have a few more steps to get through, such as selecting your country of origin, keyboard layout etc.
Patience Is A Virtue -- You'll Need It
Your computer will probably restart a few times during the installation process so you're going to need to be patient. Once it has finished you can then name your device, left-click on Next and then select Setup for personal use and select Next and then you will be asked to enter your Microsoft account details or you can select Sign-in options and then select Offline account.
Keep in mind that each person has their own preferences, so the above steps will vary from person to person. Some would prefer to log in using a Microsoft account whilst others would rather log in via a different option. This is entirely up to the user, so whichever choice you make, you will then need to follow the prompts on the screen in order to complete the setup.
Once the setup is completed you can then log in to your computer and once your computer has installed all of the necessary drivers etc you should be good to go and will be able to explore your new Windows 11.
Activation Errors
Should you find that you still have a message in the bottom right-hand corner of your screen saying that you have not activated your Windows 11, you will need to activate it manually. To do this, simply left-click on the Windows key in your toolbar at the bottom of your screen and then type in Activate and open up the Activation Settings.
You will then need to left-click on the button that says Change next to Change Product Key and then type in your product key and complete the prompts to activate your Windows. You will need to make sure that you have the correct product key for the correct version of Windows, otherwise it will not activate.
Update to Windows 11
You could also head into Settings and then select Update and Security and then Windows Update. You can check to see if your computer is one of those who are eligible for the free update and install.
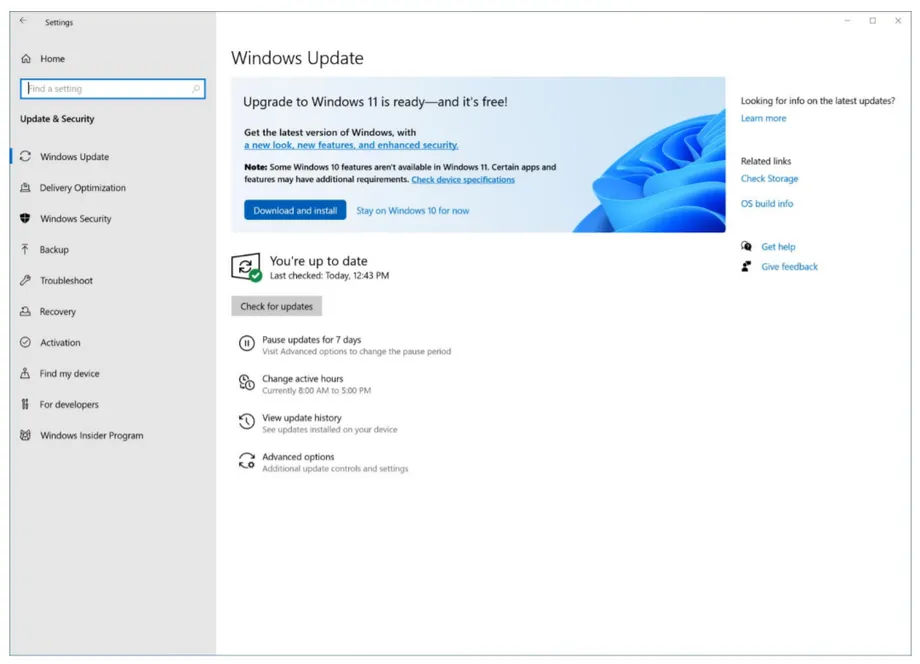
If the upgrade is available then you will see the download and install button and you can then go ahead and left-click on it and follow the prompts to get it all configured and set up.
As always, if you're needing any kind of additional help with the installation or updating of Windows 11 on your computer, consider reaching out to HelpCloud technicians for remote support.
