
Table of Contents:
- Uninstall Your Least Used Apps
- Use the Free-Up-Space Tool
- Clean Out Your Cache
- Delete any Unnecessary Downloads
- Store all Your Photos and Videos Online
In just a few short years, we have reached a time when we now live in a world where almost everything is digital and just a click away. Telephones are no longer attached to walls…but rather to our hips.
Statistics show that by 2021 over 3.8 billion people worldwide will be using smartphones. This is a significant increase in the number of users last year.
While new technology can at times be quite daunting, it also provides us with many tools to be able to document special moments in our lives, as well as a way to share these memories and moments with others.
As our phones get smarter, the quality of photos and videos also improves – and so does the space they take up. The better the quality, the larger the file size. In addition to this, we also have more apps than before.
It can be extremely frustrating when you want to take a photo or video during a special occasion, only to be faced with a message saying that you have reached maximum capacity on your device.
To prevent this disastrous occurrence, we have set out 5 simple ways in which you can free up more space on your Android smartphone and avoid that irritating frustration of receiving a message saying you have no more free space.
If you need help with these tasks, then reach out to HelpCloud Technician by-the-hour.
1. Uninstall Your Least Used Apps
One of the easiest ways to save space is to uninstall apps that haven’t been used for a long time or which will not be used again. Apps take up the majority of the space on our phones and if they aren’t being used, they are just wasting space and need to be gotten rid of.
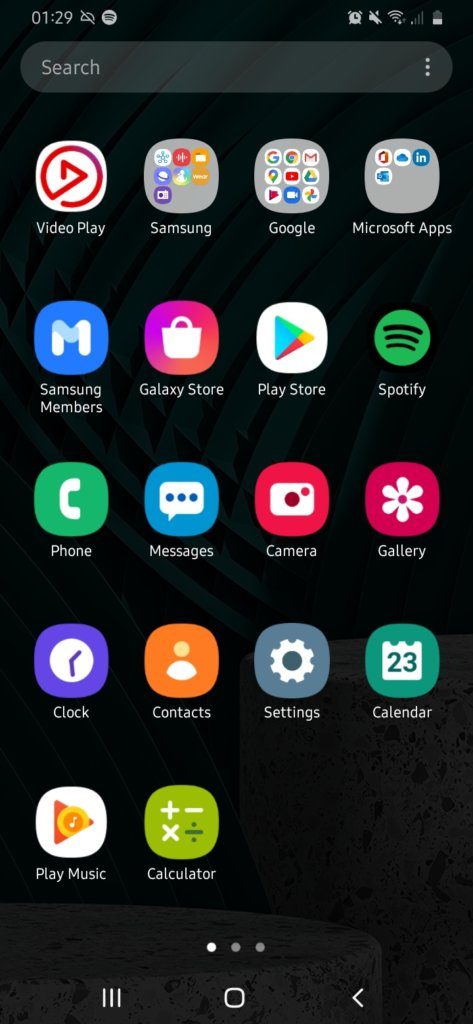
To do this, simply tap on your Play Store app.
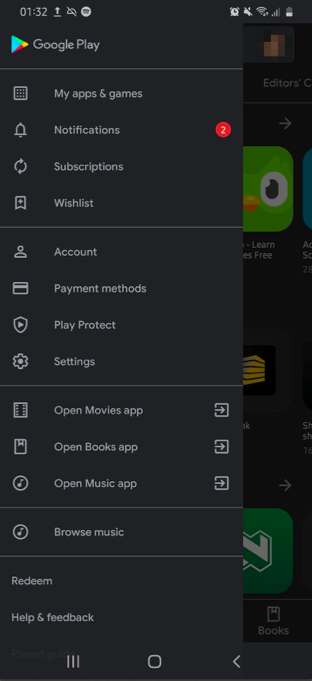
Once the app is open, you will then need to select the menu icon (the three parallel lines located in the top left-hand corner of the screen). Next, select “My apps &games”.
After this, tap on “Installed” on the top menu line. This opens up a screen that shows all of the apps which have been installed on your device.
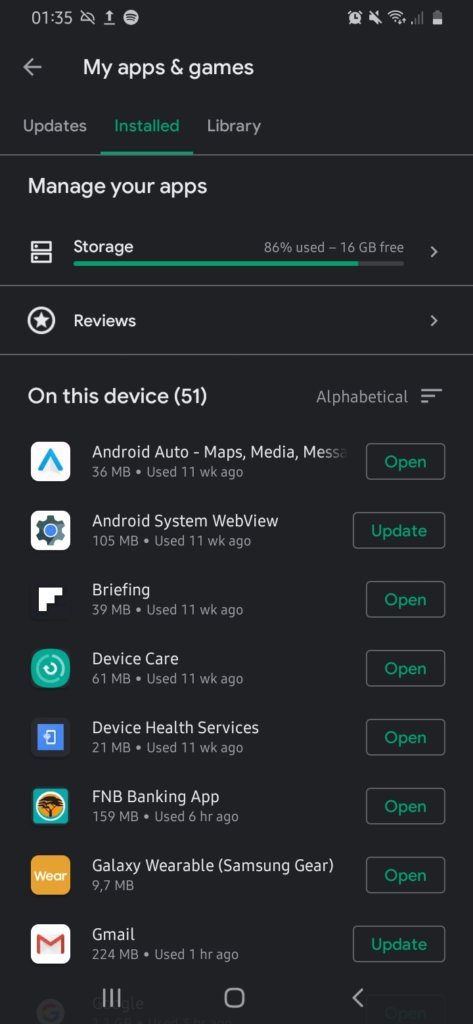
Look for the top line that starts “On this device….” On the right of that is an icon that lets you sort your list of apps. Tap on that, and choose “Last Used.”
The apps that you’ve used most recently will be on top. Swipe down to find out which apps you haven’t used in a while.
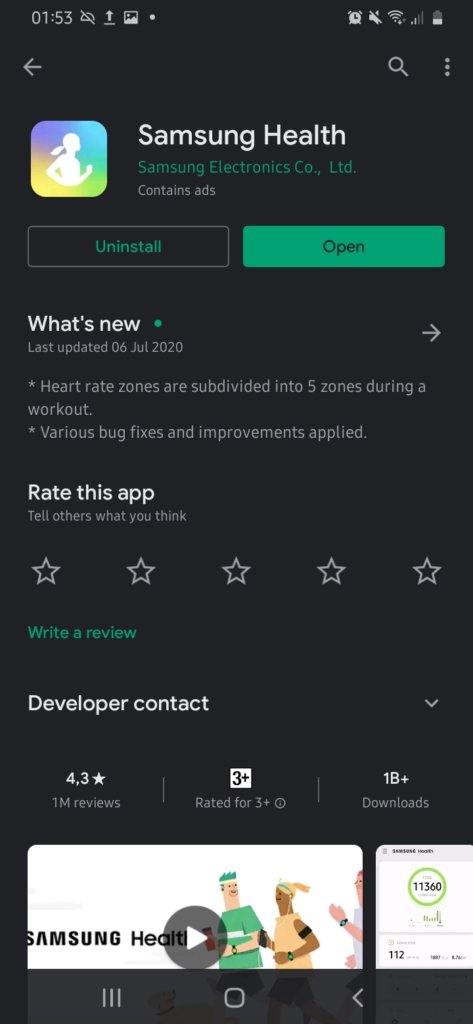
To uninstall an app, simply tap on the app you would like to remove, and then, once it opens up, tap on the Uninstall button at the top of the screen.
2. Use the Free-Up-Space Tool
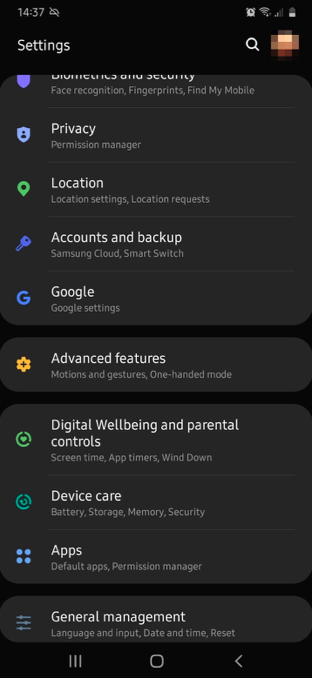
Android phones come with a very useful free-up space tool which will help to quickly free up some space on your device. To access this tool, go to Settings and then tap on Device Maintenance. On some phones, it may show as device care.
There should be a Free Up Space button there. Once you tap that, it will start to optimize and free up space immediately.
In some cases, you might not see that Free Up Space button. In that case, you would most likely see the following screen:
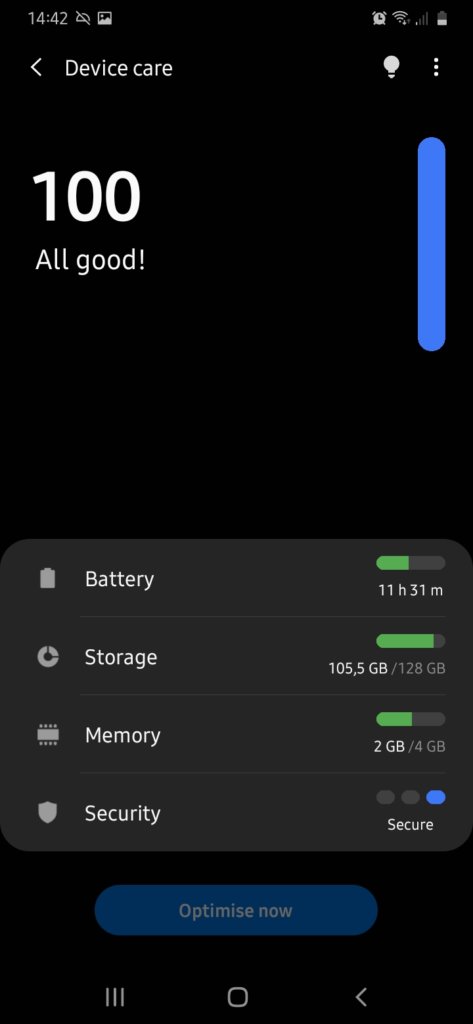
Tap on the Memory button. You will see an option to Clean Now.
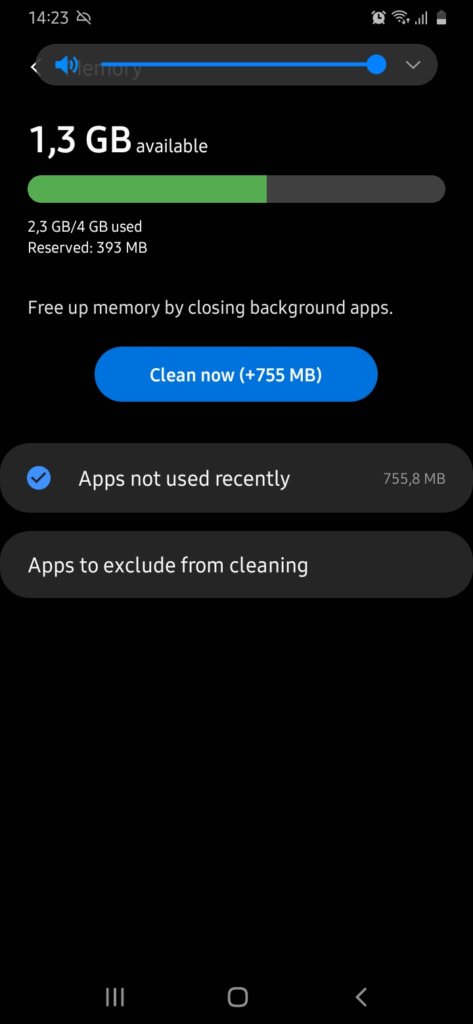
Tap on the Clean Now button and this will then free up space and optimize your device.
3. Clean Out Your Cache
Most Android apps use stored (or cached) data to give you better user experience. The files which are stored in the Apps Cache are for convenience alone and are not strictly necessary. This is generally the first place to go to if you want to clear up some space quickly.
To clear out the cache on your phone, go to your phone Settings. To get there, tap on the small gear-shaped (also known as a cog) symbol in the upper right-hand side of your phone’s screen.
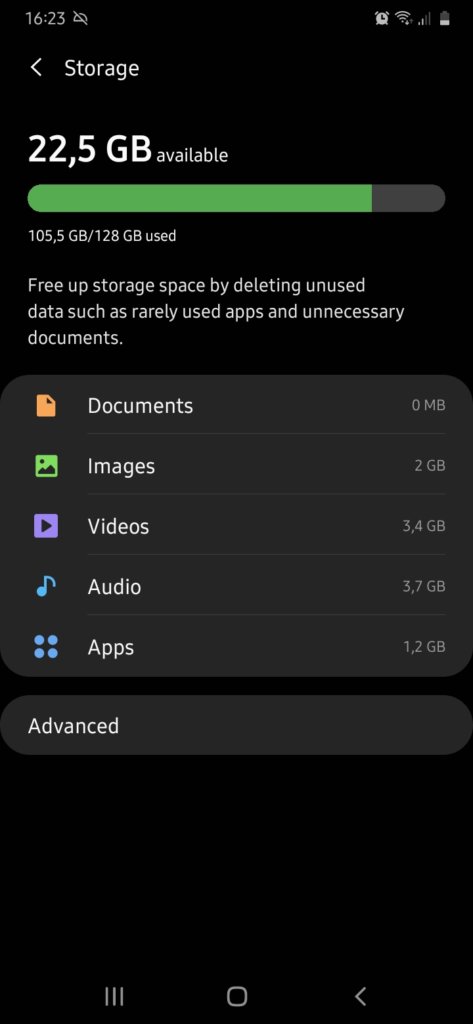
The precise location will vary depending on the version of your phone. For Samsung devices, the Storage section is found under the Device Care option. Tapping on Storage will show a detailed view of the storage space occupied by each area.
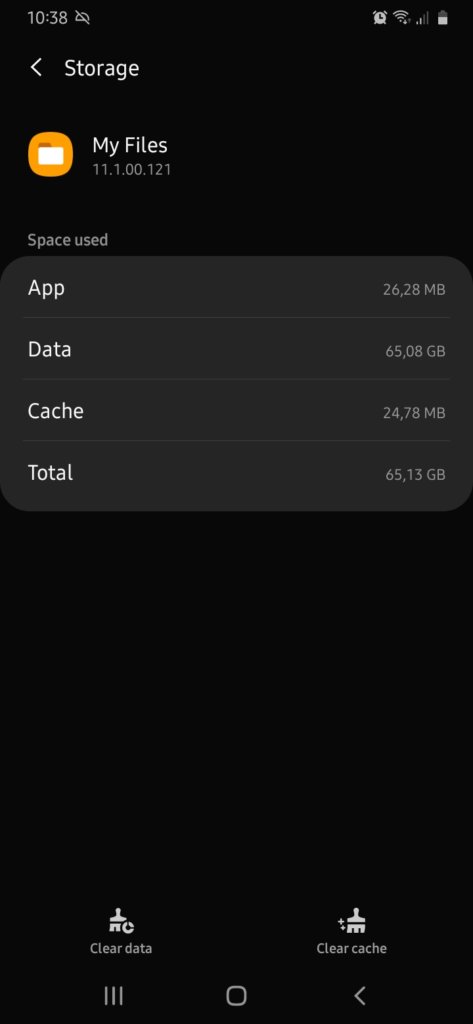
Tap on the Advanced tab and then tap on Other apps. This brings up the entire list of all apps that are on your device. Simply tap on an app and then tap on the Clear Cache button on the right-hand side of the screen to empty the cache.
While clearing out the cache does free up a little bit of space, it is only a short term solution.
4. Delete Any Unnecessary Downloads
This is another area that takes up quite a lot of free space without you realizing it. However, keep in mind that once you delete files from your device, they are gone for good so make sure that you really do want to delete them before completing the following set of instructions!
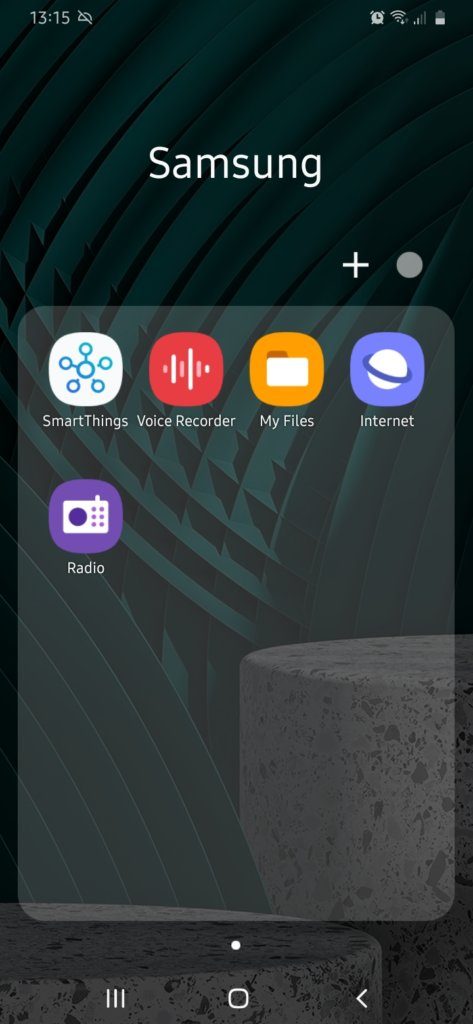
Go to the app tray on your device and tap on the folder that says My Files.
There are a few different categories to choose from (for example, Images, Videos, Audio, Documents) but you can tap on the Downloads category.
You can now view all the files which have been downloaded onto your device.
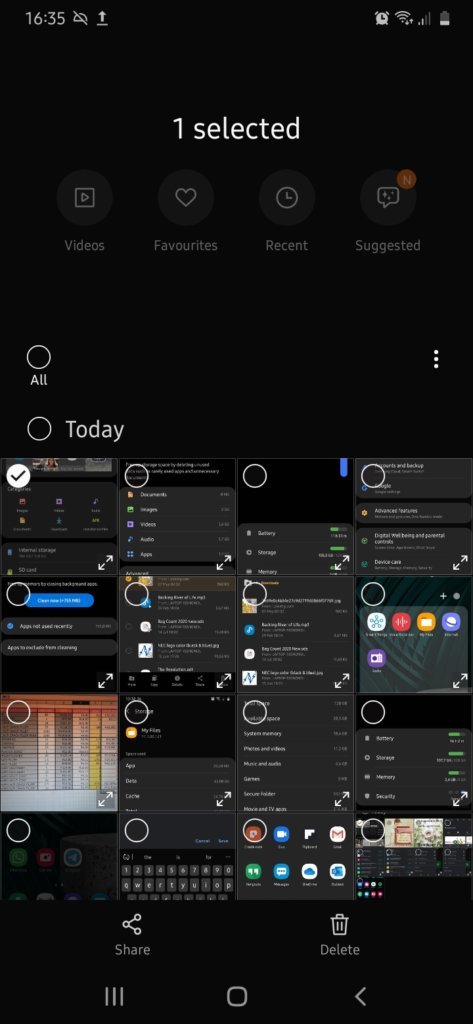
To delete a file, simply tap and hold one of the files. A tick mark will appear next to the file you have selected. In the top left-hand corner of the screen you can either select the All button, or you can just delete the one file.
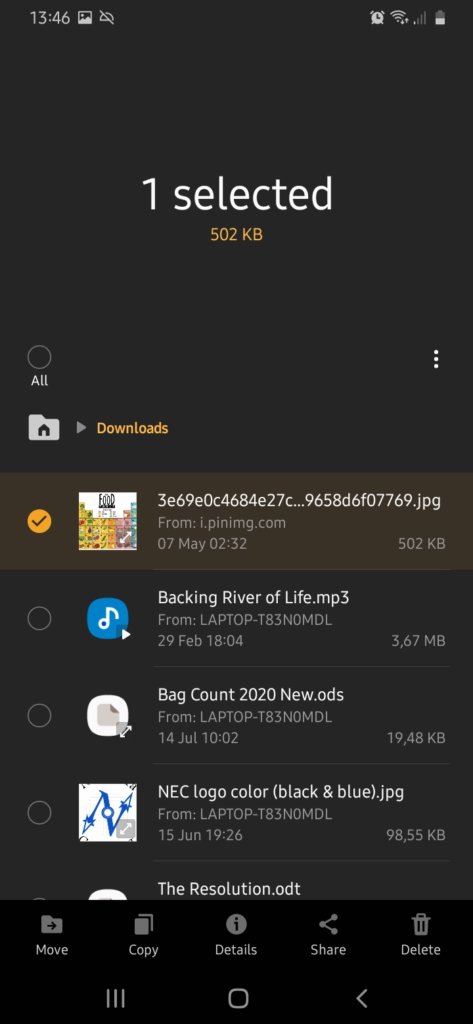
To delete the file, simply tap on the trash-can icon at the bottom right-hand corner of your screen. This will immediately delete the file from your device and free up some much needed space.
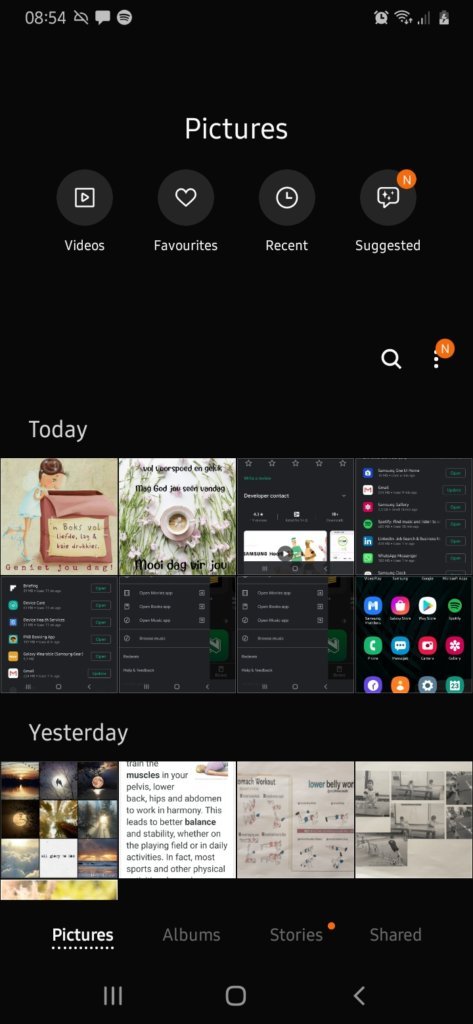
5. Store All Your Photos and Videos Online
As mentioned earlier, photos and videos can take up a lot of space. The easiest way to free up space on your device is to save all of your photos and videos to Google Drive. You can do this by going to your phone’s Gallery. Tap on Pictures, then tap the photo you would like to upload (tap and hold a photo if you would like to select multiple photos to upload).
Next, tap the Share button (this is a right-facing V with dots on each point.
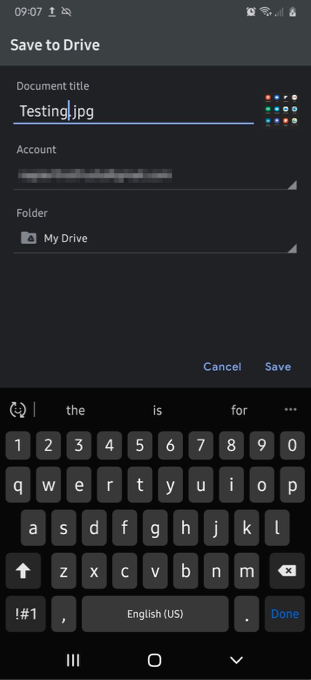
Tap the Save to Drive button.
Tap Allow to allow the Google Drive to access your photos and then select to which Google account’s Google Drive you want to save to.
Tap Folder to select the folder within that Google Drive that you’d like to save to.
Tap the folder you’d like to save to and tap Save in the bottom right-hand corner of your screen.
You can also backup photos and videos locally on a computer. All you have to do is to connect your phone to your computer with a USB cable (this is the same cable you use to charge your phone). Your Windows computer should detect your phone as a mass storage or media storage device, and you will then be able to drag and drop your photos and videos from your phone to a folder on your computer.
Once you have saved your photos and videos either on Google Drive or on your computer, you can then delete them from your phone, which clears up a significant amount of space.
The Last Word …
Android devices are awesome to have but they do require some upkeep and one main disadvantage of them is the lack of adequate memory. Keeping these five points in mind will help to ensure that you don’t face another “out of space” message again.
It would also be beneficial to invest in a microSD card. Using a memory card is a safe and reliable way to free up some of the internal storage on your device.
As always, if you are having any kind of difficulty with Google Calendar, consider reaching out to HelpCloud Technicians for remote support to help resolve the issue.
