Windows 10, the newest edition of the long-running Microsoft operating system, is slick and polished. But if you want to make it your own, you’ll need to do a little work to it. What will it take to make your Windows 10 appearance the way you want it?
It’s not as hard as you’d expect.
If you want to customize your computer’s appearance and themes, you can do it simply and easily, with no fuss and nothing extra to download. Here’s how below.
If the task proves to be too difficult, then reach out to HelpCloud Technician by-the-hour and we’ll configure your settings exactly how you want them.
Open the ‘Personalize’ Panel
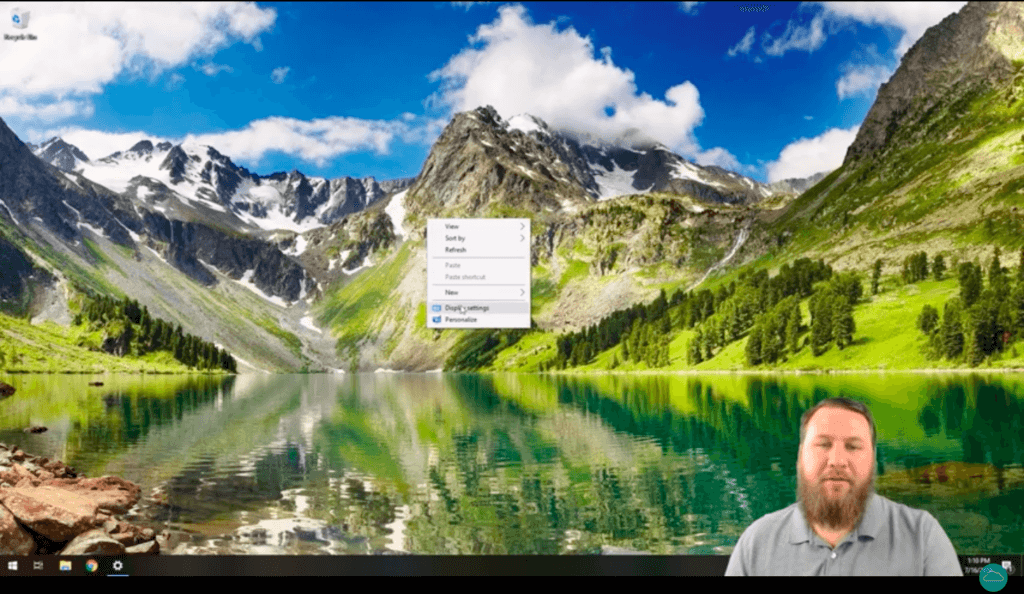
The easiest way to get to your personalization settings is to right click on the desktop. Your desktop is the area you see when you have no windows open. Right click somewhere on an empty spot and you’ll bring up a small menu, and you can click “personalize” on that menu to open the panel.
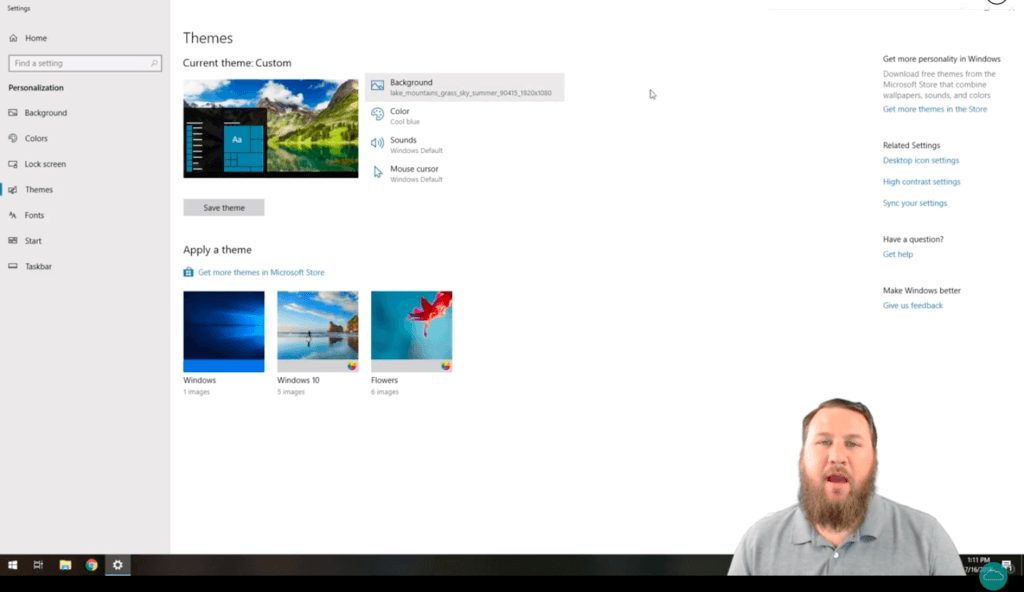
Once you have that panel open, it will automatically take you to the “Background” section. You’re going to navigate to the “Themes” section, though. Look at the darker gray bar on the left side of the screen, find the section that says “Themes,” and click on it.
Themes are groups of settings that affect the appearance of your operating system. They’re more than just a desktop picture. You can use them to customize many different aspects of the way your computer looks.
If you want to change individual settings for your computer, it’s easy to do. There are four different panels you can click on, as seen in the following photo. They’re right there in the top middle of your screen.
Background
“Background” allows you to change the background of your desktop, giving you a different look. If you’ve used Windows before, it’s pretty similar to previous versions. You’re not going to see much that’s changed here.
There are three options you can choose from the first drop down box here. “Picture” is exactly what it sounds like: a picture. There’s a drop-down box under this panel that asks how you want the photo to be displayed, and each setting does something different. Play around with these to see how they each look with your photo.
Windows comes with quite a few pictures that can be chosen directly from this panel, but if you want to use a different one, you can use the “Browse” button on the page to find your chosen photo. This is great for taking, say, a family photo that you saved to a USB drive and making it into a desktop background.
“Slideshow” allows you to select a folder and change the background periodically to a new photo from that folder. It defaults to your Pictures folder, but you can choose something else if you have photos saved elsewhere.
“Solid color” allows you to choose a solid color instead of a background picture if you want to keep it really simple.
Once you’ve chosen your desktop background, you have another choice to make: what do you want your lock screen to look like? You can click on “lock screen” in the dark gray bar at the left to move to that group of settings too. There are a few slightly different options here, but there are three main options on the top drop down menu: “Windows spotlight,” “Picture,” and “Slideshow.”
The last two work exactly the same as the desktop background does, but “Windows spotlight” is a little different. It downloads and rotates through a selection of backgrounds from Microsoft. Basically, it’s an automatic version of the slideshow option that doesn’t require you to set a folder.
The other lock screen settings on this page are mainly used to customize what apps display data on your home screen. If you want an app to display while your screen is locked, you can click on one of the plus signs to add it. Simple.
Color
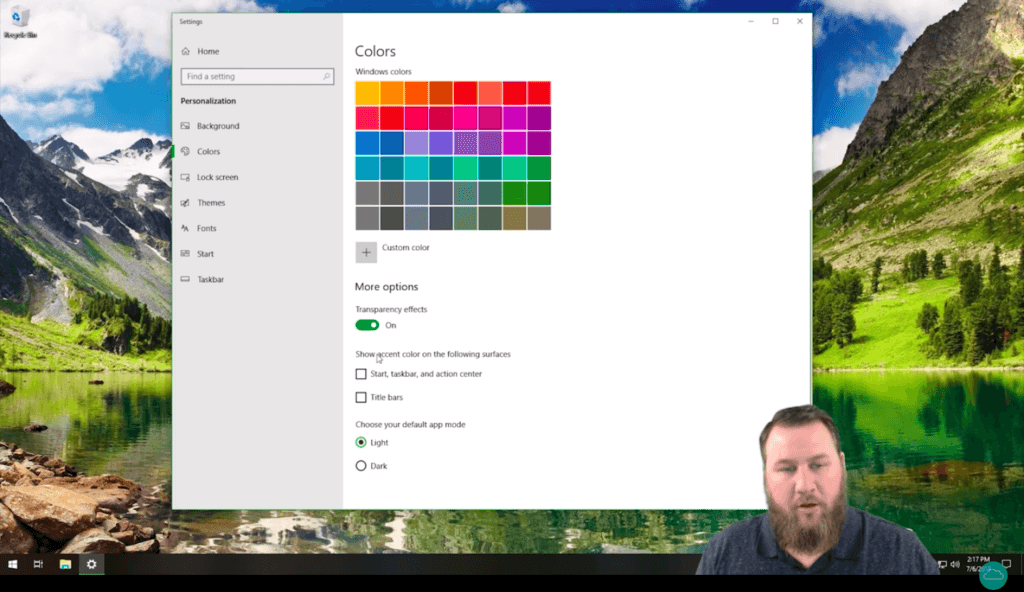
“Color” allows you to pick the color that’s used for icons, some taskbars and other main display options for your system. There are a few settings that can be played with under here involving transparency and pulling extra accent colors from other areas.
If you want to just change backgrounds without worrying about choosing a complementary color, you can check the box that says, “Automatically pick an accent color from my background.” This will change the color of your taskbars, icons and other things to something averaged from the photo used for your background.
If you want to adjust it more specifically, there are some more settings available.
The “Transparency Effects” slider allows you to choose whether your taskbars and other details show up translucent or solid. You can also customize where your accent color shows up with the check boxes shown there too.
Sounds
“Sounds” is usually not worth messing with, since there are so many sounds that you could adjust. It’s possible to change the sounds that play for different system events, but unless you have a specific reason for doing it it’s not practical or necessary.
Cursors
“Cursors” allows you to adjust your mouse pointer to a different type or color. Similar to “Sounds,” unless you need to adjust something specific like the size of the pointer (for limited eyesight), it’s better to leave this alone.
If you do need to change your pointer to a different size, though, click on the “Pointers” tab in the “Cursors” window, click on the drop down menu at the very top and choose a different theme.
There are several different types of themes for cursors, including larger sizes, different colors, and color inversions designed for color blind users. Pick whichever matches your needs best. Or pick whichever one you find more interesting, if you don’t have a specific reason for one of the special ones.
Saving Themes and Getting More Themes
Once you’ve customized the settings for all of these, you can actually save them as a custom theme. That lets you select the theme whenever you want to choose those settings all at once instead of having to go back and adjust them all manually again.
You can think of plenty of uses for this. Do you sometimes use your computer with your glasses and sometimes without? Maybe you have a theme that adjusts the colors to a higher contrast and makes the mouse cursor bigger. Do you get tired of looking at the same desktop background?
You can make a bunch of themes with different colors and backgrounds and switch between them when you get tired of them. Whatever settings you want to save, the theme system will allow you to do it.
To save your theme, click the “save theme” button just under the small picture of your desktop background.
You can then choose between your themes by clicking on whichever one you want to apply. Your saved themes will show up on the bottom of this page along with the themes that come with Windows and any other themes you’ve added.
What about adding themes?
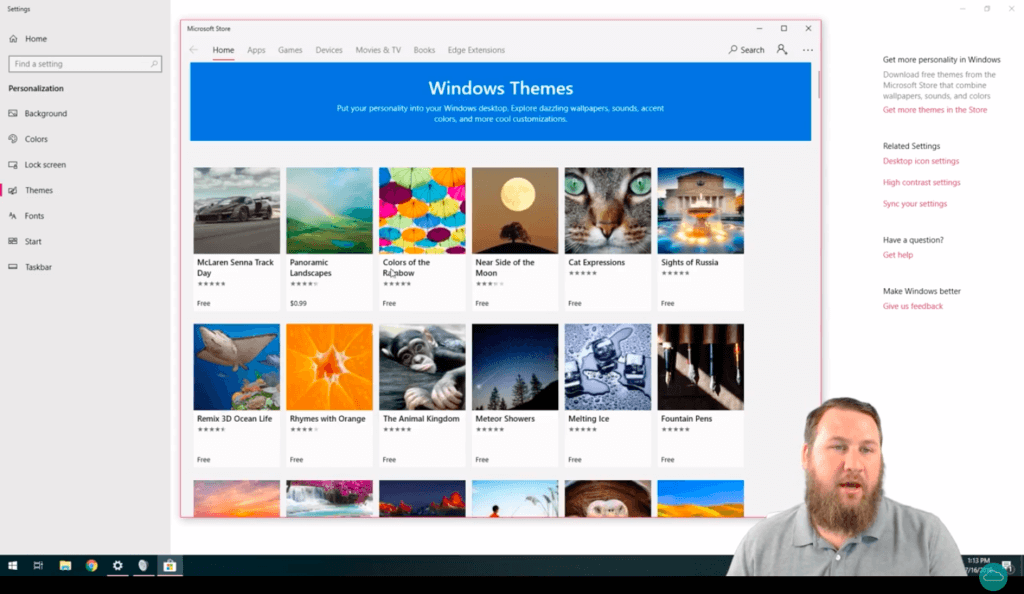
If you want to download a theme that someone else has created, it’s very simple. All you have to do is click the blue text in the middle left that says, “Get more themes in Microsoft Store.” You can look at themes that other people have created and download them for even more variety. The system may prompt you to create a Microsoft account if you don’t have one or log into your account if you do.
Even themes that you’ve downloaded or themes that come with your system can be customized. Play around with the settings and save them as a different theme if you want to. Feel free to make them your own.
Customization: Make Your Computer Your Own
If you just leave your computer the same way it came to you, what’s the point?
Having the ability to customize your desktop background and the way your computer works lets you do things like look at a slideshow of your family photos, or change colors to something you think is more aesthetically pleasing.
When you don’t use the customization options to change your appearance and themes, you’re missing out on a huge part of the Windows experience. It’s not nearly as hard as you think to do it, and if you’re having trouble there are people that can help. You can refer to this article to get started.
And if that’s not enough, you can reach out to HelpCloud Technicians for remote support that will help you fix any tech issues you’re struggling with. HelpCloud technicians are trained in helping people of all experience levels get the most out of their technology.
No matter how comfortable or uncomfortable you are with technology, you can customize your Windows 10 appearance and themes. With this guide at your side and HelpCloud’s services at your disposal, you’re well equipped for any task.
Let HelpCloud help you make the most of your digital journey.
