
These days we spend so much time staring at our computer screens that we become complacent about the state we leave them in when we finally shut down and take a break away from them. For the most part, many of us will probably have to admit that our computer desktops are not the neatest or most organized out there.
It is so easy to just put everything on the desktop that we tend to do it more out of convenience than anything else, except that after a while it becomes a habit and before we know it our desktop looks like a jumbled mess and we can never find what we're looking for and we often spend ages searching for something which we know is somewhere ...
We're just not sure exactly where.
If this sounds familiar, then the following tips will definitely be useful and will help you in getting your desktop organized and even personalized as well. There is so much that one can do but we're going to stick to just a few simple tips to organize your desktop and also give you a few pointers on how to personalize your desktop while you're busy cleaning it up.

1. Create and Sort Folders
Before you start doing anything, it's best to first decide on a method. Some people prefer to store their files according to date, whereas others prefer according to name. Once you decide what would best suit your needs, you can start by creating folders and then sorting all the documents, images, videos etc into those folders.
Folders are key to a great organizational structure. To create a new folder on your desktop, all you have to do is right-click on your desktop and select New, then after that left-click on Folder.
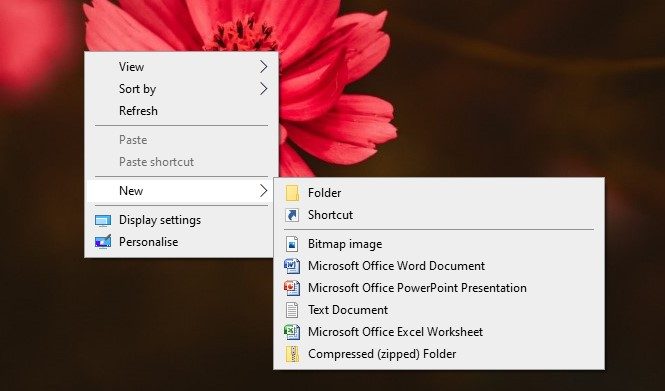
Now you can rename the folder and once you have done that you can create as many folders as you need and then start to sort all the items on your desktop into the right folders.
You can sort the items on your desktop quickly and easily by simply right-clicking on your desktop and then selecting Sort by and in the pop-up menu left-click on either Name, Size, Item type or Date modified.
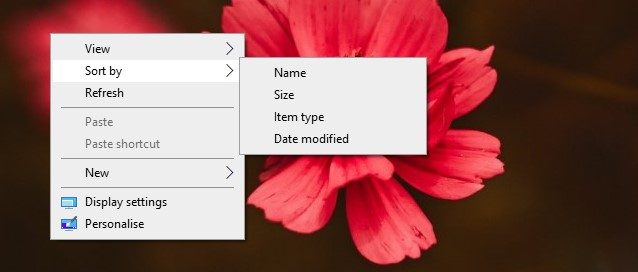
This will automatically sort all of your desktop items into groups so that you can easily sift through them and put them into the correct folders. You can add items to a folder by simply left-clicking on it and then "dragging" it by holding down the left-click mouse button and then letting go once it is hovering over the right folder.
Otherwise, you can also right-click on the item you want to move, select Cut and then going to the correct folder and opening it and then right-clicking and selecting Paste.
2. Put Things In the Right Storage Space
Once everything is in the correct folders, you will still have a bunch of things on your desktop that don't need to be there. Perhaps there are folders that you don't need to have right at your fingertips. These can then be moved to the correct storage space -- somewhere other than your desktop.
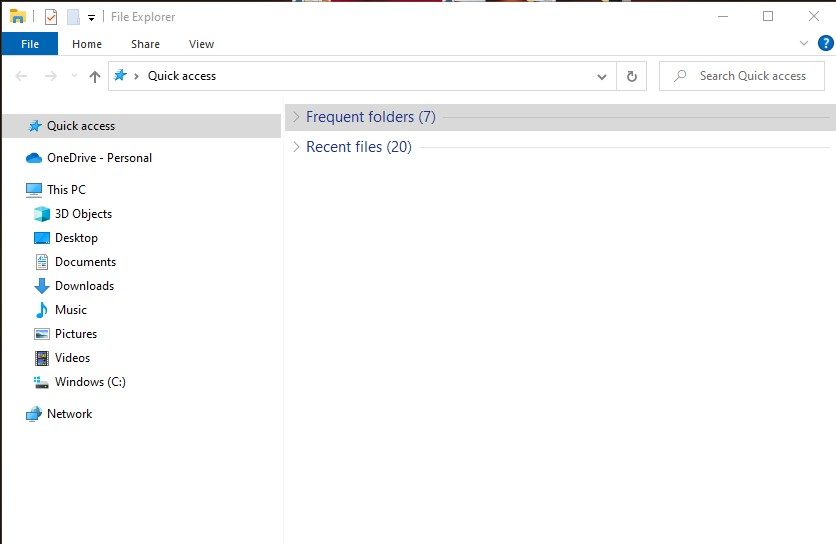
A good place to store things would be File Explorer. You can store all your documents, photos, music etc all under the correct storage space. For instance, if you open File Explorer you will see that there is already a storage space called Documents, Music, Videos and also Pictures.
If you have a folder that contains your music, you can simply right-click on it and then select Cut. Now you can go into your File Explorer, right-click on Music and then right-click and select Paste.
The entire folder will now be moved from your desktop into your File Explorer, under the Music tab. You can move multiple folders under these main sections, especially if you prefer to sort your music or movies by genre.
The same is true for your documents or pictures. It's really very simple and it will clear up the clutter on your desktop in no time at all. It's also really easy to search for what you're looking for.
Simply left-click the Start button, then type in the name of the folder you are looking for and it will bring it right up for you. Alternatively, open File Explorer and select the location where you saved the folder you are searching for and it will show all available folders under that location.
3. Make Your Taskbar Work for You
Whenever you install a new application on your computer, it generally asks you if you want to save a shortcut to your desktop. Most people just agree to that, which is fine if you only have one or two applications. It becomes a problem when you have a lot more than that.

Instead of saving shortcuts to your desktop, consider instead to pin them to your Taskbar, which is the bar that appears at the bottom of your screen.
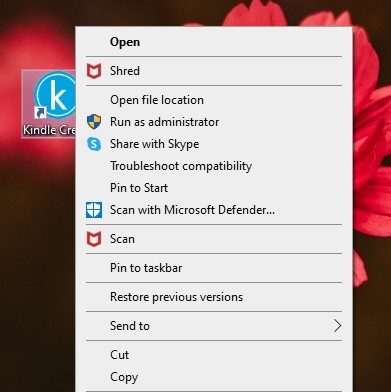
To pin a program to your Taskbar, all you have to do is right-click on the program and then select Pin to taskbar. This then adds the program to your Taskbar below and you will then be able to open it by left-clicking on it once.
4. Make Use of Themes and Wallpapers
When you first start up your new computer you are asked to complete a few steps to personalize it and make it your own by adding a name and login details etc.
However, once that is done you're still left with the normal Windows themed desktop. Now it's time to really make the computer your own by adding your own wallpaper (or desktop background) and using a theme or personal color scheme.
To add wallpaper, you can right-click on your desktop and then select Personalization. In the left-hand tab, make sure you are on Background. In the right-hand pane you will see that you can select pictures from images currently on your computer, otherwise you can browse for wallpapers online and then save them to your Pictures folder.
In the right-hand pane under the Background drop down menu, you can choose to have either a picture as a background or else a solid color or even a slideshow of all (or just some) of your images.

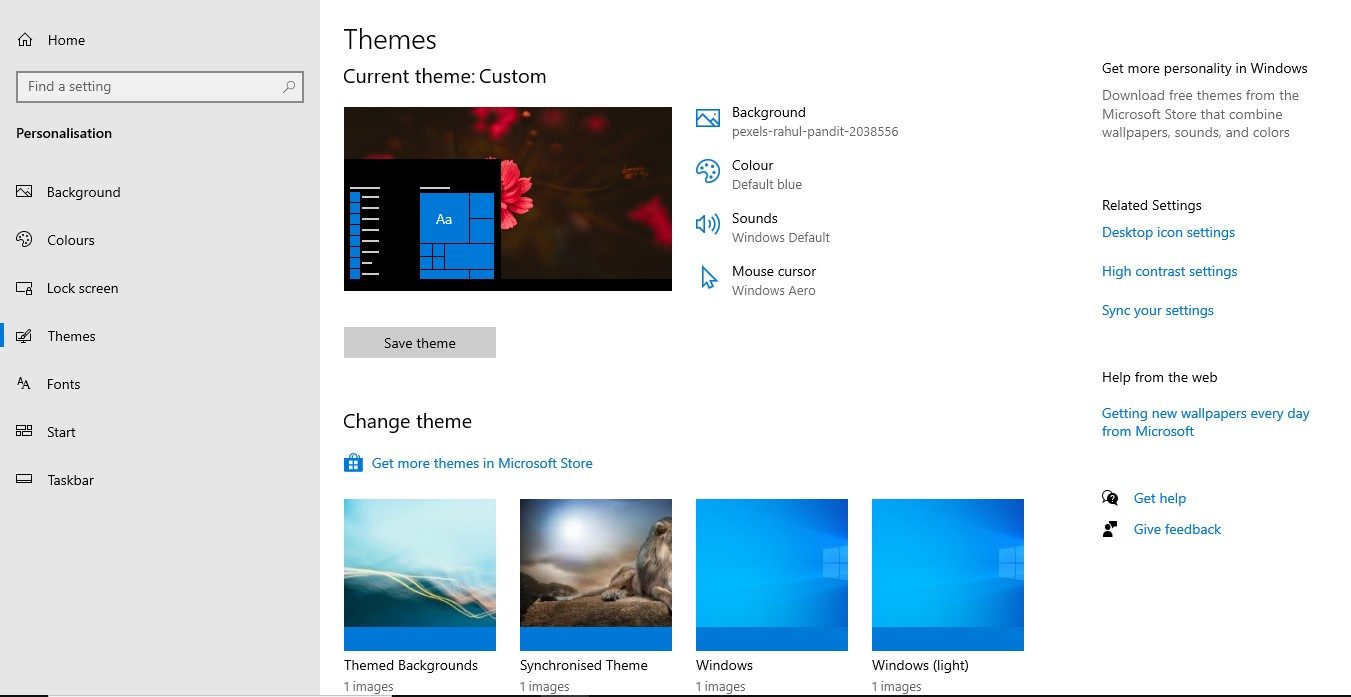
You can also choose to change the theme of your computer. To do so, in the left-hand pane navigate to the Themes tab and then left-click on it. In the right-hand pane you will see that you are able to change the color scheme, the different sounds the computer makes when certain actions are taken as well as what your mouse cursor looks like. You can also browse the Microsoft Store for different themes if you don't like any of the ones already on display.
You can play around with these settings until you have customized your computer to the look and feel which you like.
5. Remember: Your Desktop Is Only for Temporary Work
We're not saying it's totally taboo to save things on your desktop, but it is good practice to use your desktop as a temporary working area only. If you have a project you're working on that requires you to constantly use a certain document or folder, then having it on the desktop in easy reach is probably a good idea. However, once you're done with it, move it to the correct storage space to avoid cluttering up the desktop again.
You may find that you also occasionally need to save something quickly and it's always convenient to save to the desktop. Only don't forget to move those files to the correct folders at the end of the day/week otherwise you may end up back at cluttered square one again.
6. Get Rid of Unwanted Files and Applications
Another sound practice is that of getting rid of all the unwanted files and applications that tend to gather dust on the desktop. If you haven't used it in the last year or two, chances are you aren't going to need it and it's best to delete it completely off your computer.
Documents, images and videos are easy to delete. Simply left-click on them and send them straight to the trash bin by pressing the Delete button on your keyboard.

Applications aren't as simple, as you have to navigate to Start, and then go to Settings (depicted by the cog shaped icon) and then left-click on Apps. Make sure you are on Apps and Features in the left-hand tab and then on the right-hand side scroll down until you find the application you would like to uninstall. Now you can simply left-click on the Uninstall button and once the program is finished being uninstalled it will disappear from the list.
7. Make (and Stick to) an Organizational Plan
One of the most important points to remember is that you need to make (and stick to) an organizational plan. Once you have decided on how to name your folders and where to put them where they will be most easily accessed, don't deviate and compromise -- stick to your system no matter what.
Plan to clean out the trash can at least once a week, as well as making sure that your desktop is always left neat and tidy at the end of each work week. If you do that, then you won't ever need to do a major clean up -- it will always just be "light cleaning".
As always, if you're needing any kind of additional help with the organization or personalization of your desktop, consider reaching out to HelpCloud technicians for remote support.
